Sunday, December 30, 2012


scarf   n.   a length or square of fabric worn around the head or neck


January ... brrrrr! Winter is fully upon us now and where I live it's COLD! I was going through my pile of scarves looking for something to wrap around my neck and shoulders to take the chill off. All of my scarves were long and narrow and no matter how many times I looped them around it just wasn't what I was looking for.

Off to my yarn stash to knit just the right scarf to wrap myself in cozy goodness. The result is this month's project: a Triangle Scarf. Knit with fine yarn on large needles this scarf is large, soft and warm without being bulky. And hopefully it's a little stylish, too.


For my scarf, I used Vanna's Glamour, a lightweight acrylic yarn with a thin metallic thread. Most lightweight (size 2) yarns are animal fibres (wool, angora, alpaca, etc.) which may irritate your neck and chin. I tend to shy away from these because I am sensitive to animal fibres, but sometimes a yarn just screams out to me and I give in to a wool yarn. But I have a trick for being able to wear wool. Once my project is finished, I hand wash it in Soak, then rinse it in water mixed with hair conditioner (just like you use on your head in the shower). The conditioner smoothes the hair fibres and reduces the itch-factor.

If you are looking for a cozy scarf pattern, why not try my Triangle Scarf – an easy, quick p[roject to start of the New Year.

Wednesday, December 5, 2012

... prizes


prize     n.     1. Something offered or won as an award, as in a contest or competition.


November was a busy month here at the Knitting Doodle.  I asked you to sign the Guest Book and you responded enthusiastically.  Your reward for doing that entered your names into a draw for a knitting prize package. 


Drum roll please ... the winner of the draw is DENISE PYNE of Sarnia, Ontario.  Congratulations, Denise!  Here’s what’s in your prize package: 

Knitting Doodle Tote Bag
2 Balls of Sunburst hand-dyed wool
2 hanks of Riverstone Yarns hand-dyed wool
US Size 7 Turned Wood Needles by Serendipity
Newborn Hospital Hat kit
2 packets of Soak

The draw was done on Saturday, December 1st, 2012 at Random Picker.  To see the list of entrants and the results, go to http://www.randompicker.com/protocol/16589x57073 .  It was so much fun to see where some of the Knitting Doodle followers are from and to read their encouraging comments. 

 
The Knitting Doodle started out in 2009 as a simple blog.  In January 2012, I launched it into a full website and to my surprise it has really taken off.  My goal in starting the Knitting Doodle website was to make a site that any knitter could have some fun with.  I had heard too many comments from beginning knitters that so many of the knitting sites and blogs out on the net seemed too advanced or highbrow.  I decided to do something about that!  The Knitting Doodle tries to put out monthly projects that beginning knitters can tackle with ease, but advanced knitters can alter to make it more challenging. 

 
And here at The Knitting Doodle we think it‘s just fine if you go to Michael’s and purchase Value yarn for your project or hit your local yarn shop for some more exclusive (expensive) yarn.  That’s one of the neat things about a knitting hobby.  It’s as expensive as you make it.  The point is you are doing something you enjoy ... knitting!


You may have noticed in the last month the addition of advertisements on the Knitting Doodle site.  I am trying a few different things to generate some income from the site.  Operating a website isn’t free.  Surprise, Surprise!  Whatever I decide for the future, I am committed to keeping the patterns, projects and videos free of charge. 


And, of course, I love hearing from you!  Let me know what you would like to see on the site.  Ask questions in the Doodle Forum.  Share the site with friends.  I’m really looking forward to 2013 and some of the projects I have lined up for you!  I guess you could say that YOU (the followers of the Knitting Doodle) are my prize package!  Thanks!

Friday, September 28, 2012

Headbands

headband:  n.   a band of fabric worn around the head.  (duh!)


It started with this Facebook posting from my niece:  “Knitters of the world who need a project - I could use some chunky (cute) headbands.”  Of course, I just had to take up the challenge!

With Christmas in the not-too-distant future I thought I might kill 2 birds with 4 projects!  I would make some headbands for my niece and offer you some easy, fun … and QUICK projects for Christmas gifts or stocking-stuffers. 


To make things easy, 3 of the headbands use basic knitting worsted weight (#4) yarn and only need about 90 yards of yarn. The 4th headband uses bulky weight (#5) yarn.  Look through your stash and start knitting!  I am offering 4 levels of difficulty with these patterns so ANYONE can make at least one of these!


Level 1:  Thermal Stitch Headband
This is the easiest headband pattern. 
It uses only knit and purl stitches.
And this one uses bulky yarn so it
knits up quite quickly.


Level 2:  Saturn’s Rings Headband
This is slightly more work … using knit,
purl, increases and decreases. 
My neighbour really liked this one! 


Level 3:  Ridge-Stitch Headband
This headband steps up a bit more in difficulty.
It uses knit, purl, increases, decreases and
YO (yarn overs).  It is a 4-row repeat pattern.


Level 4:  Cable-Twist Headband
This is (surprise) the most difficult headband.
It uses knit, purl, increases, decreases and
Cable to the front.


I hope you have some fun with these headbands.  It was fun imagining and designing them.  They are all sized for an average woman’s head.  To make it large enough for a man’s head add an extra 1” – 1½“ between the increase rows and decrease rows.

And, as usual, I’d love to see pictures of your finished projects.  If I get enough I’ll create a gallery of your work!  Knit on … ! 


Thursday, August 30, 2012

Once more 'round the block


Block,  v.  [blŏk]  To shape, mold, or form with or on a block


Oh dear.  I’m going to sound like a broken record this month!  I am once again going to extol the virtues of blocking your project pieces before sewing seams or knitting edges.  I can’t stress enough how professional your finished project will be if you just block!  We’ve all finished the knitting only to have something like this to deal with … curled edges and skewed pieces.


First, let’s talk about fibres.  Animal and plant fibres respond best to blocking.  This includes wool, alpaca, bamboo, corn, silk, cashmere, etc.  And then, there are those man-made fibres … the acrylics.  Acrylic yarn is sometimes called the memory yarn because it always goes back to shape after being washed and dried.  But that doesn’t mean you can’t manipulate that “shape” at this stage of your project. 


Whether you are working with animal, plant or man-made fibre, the first step of blocking is washing the knitted fabric … BY HAND!!  NOT IN A WASHING MACHINE!!  I use a handwash detergent called “Soak” which you can buy in almost any lingerie department.  A small amount of this in a sink full of water is all you need to get out the manufacturer’s sizing and oils from your hands, making the fabric ready for blocking. 

I fill a small sink about halfway with water and put ½-capful of Soak in the water.  I lay the knitting in the water and gently push it to the bottom of the sink with open flat palms repeatedly.  The idea is to gently push water through the fabric without wringing or twisting.  Drain the sink and fill with clean cool water and again push water through the fabric to rinse it.  Drain the sink again and push excess water out by pressing the fabric against the bottom of the sink.

Transfer the wet knitted fabric to a large bath towel, being careful not to stretch it.  Lay it gently on the towel allowing it to be slightly bunchy rather than spreading it out smoothy.  Next gently roll the towel to absorb excess moisture.  Leave it rolled for 5-10 minutes.


Now comes the real work of blocking – pinning it to a drying board.  I purchased a cardboard cutting board from a fabric shop and covered it with clear MacTac (contact paper).  Having the 1” grid is very useful for pinning the pieces symmetrically and to the size noted in your pattern.  In my opinion, you can never use too many pins!! 

With the knitted fabric all pinned, now you wait.  Where I live the air is so dry that I can usually just let it dry overnight.  You may have to wait longer to make sure the pieces are COMPLETEY dry before removing the pins.  Then comes the magic:  the blocked pieces stay flat and to size after you remove the pins.  No more curls!


The pictures here show the knitted piece of the pattern I’m offering this month:  a bolero for a baby (using some of the Kool-Aid dyed yarn from a couple months ago).  It is knit in one piece so taking the time to block your work ensures that the left and right sides are symmetrical and will sew together nicely.  And of course, it gives that perfectly finished look!


To block or not to block?  Definitely block!


Monday, July 30, 2012

lace


Lace  n.   [lās]  A delicate fabric made of yarn or thread in an open web like pattern.

The hot part of the summer … August.  For many of us, this summer has been unusually hot for weeks already.  Hot weather does not always inspire knitting.  At least not for me.  So I thought if I knitted something light and airy I might not feel the heat so much.

So what could that project be?  A lacy scarf?  No, you wear scarfs for style and warmth.  A shawl or wrap?  No.  Again that is something you wear for warmth.  Then it dawned on me:  a knitted mesh tank top to wear over a solid tank or a bathing suit!  This is not a piece of clothing I would probably have in my closet so it was time to poll my young nieces.  All of their suggestions resulted in a soft, stretchy tank top in a cheery summer yellow.

This month’s Summer Mesh Tank is knit in one piece from the top down in a very basic lace stitch using large knitting needles (size 15).  If you have ever knit with large knitting needles you may have discovered that it is almost impossible to achieve a flexible, flat bound-off edge.  By the very nature of the bind-off stitch the fabric pulls together and loses its stretch.

So for this pattern I have incorporated a useful technique to avoid this problem.  It might seem odd when you read through the pattern, but basically the technique has you doubling the number of stitches on the row just before the bind off row.  Doing this gives you a flexible edge with a pretty braided look to it.

This technique is useful on all sorts of projects when you need to help the bound-off edge a little. 

Why not knit up a cool summer tank to be cool … and cool!

Monday, July 2, 2012

Oh Yeah!!


KoolAid  n.  a brand of flavoured drink mix.

If you remember this guy and the phrase “Oh Yeaahh!” then you are probably near me in age.  KoolAid is still a favorite drink of children all over.  Since it’s sumer and KoolAid season I thought we might have a little fun this month.  We’re dying yarn with ... KoolAid!!

Unlike commercial yarn dyes, KoolAid is inexpensive, non-toxic and easy to work with.  It is naturally very acidic so you don’t even have to mess with vinegars or ammonia to set the dye.  So gather up a few tools and the kids and have some fun.

You do have to choose your yarn carefully.  You want untreated animal fibers – wool, alpaca,etc.  Plant or man-made fibres will not work.  By untreated I mean that the wool cannot be treated for machine washing or drying – so no washable wool for this project!  If you are not sure, just make sure the washing symbols match these:


 What you need:
Yarn
Unsweetened KoolAid  (do not add sugar!!)
A large pot  (steamer insert is optional)
4-cup measuring cup
Bath towel
Rubber gloves and an apron might be useful, too, since KoolAid  stains!


How to dye with KoolAid:
  1. Unwind yarn and form into hanks of 50-60 yards.  Using the back of a chair is handy for this if you don’t own a swift.
  2. Tie the hanks in 5 or 6 places to hold the yarn together.  Use acrylic yarn for the ties so it’s easy to find when you are done.
  3. Wash the yarn in mild soap (don’t swish or wring it; just gently squeeze it).  Then let it soak in clean water until you are ready to place it in the dye.
  4. Dissolve KoolAid in 4 cups of water.  For a softer mottled look, use one package.  For a more intense colour, use 1½ packages.
  5. Pour KoolAid into your pot.  Place yarn in the pot (don’t bother to press any water out of it) and add enough water to cover the yarn.
  6. Heat the yarn-filled pot to almost boiling.  Turn off the stove and let the yarn rest in the water for 30-40 minutes.  You’ll know the yarn is ready when the water is mostly clear.  And it will be!!  If it is not, just repeat this step again.
  7. When the water is mostly clear, gently remove the yarn and rinse it in a sink of water that is roughly the same temperature as the dying pot.  Colder water may shock the yarn and cause felting.
  8. Wash in mild soap and rinse again.
  9. Remove hank gently from the water and press out some of the water.  Place the hank on a clean bath towel and roll it up.
  10. Unroll and hang to dry.
  11. Once dry, the wool can be wound into balls for knitting.   


So, what should you do with this fun-coloured yarn?
Why, make some KoolKats, of course!!


Thursday, May 31, 2012

Variegation


Variegation:  adv. varied in appearance by adding and changing colours.

 We’ve all done it.  Strolled the yarn aisles, picked up the yarns to feel them – savoring the soft silky ones, fingering the nubbly ones, and … oddly drawn to the bombardment of colour from the variegated yarns … and inevitably finding that one multi-coloured yarn that you draws you in.  You don’t have a project in mind for it, but you just can’t resist buying it.

And then the second thing happens … it doesn’t knit up as nicely as you thought.  It just doesn’t have the same appeal it did in the skein.  What went wrong? 

Multi-colour (variegated) yarn comes in all kinds of patterns:  long variegations where the colour changes every few rows … and short variegations where the colour changes every few stitches.  The colours may repeat randomly … or in a specific pattern.  The colours might create a design, as in self-striping yarn. Or maybe they are twisted together to create a tweedy look.  These are all things to take into account when choosing a pattern for the yarn  - or the yarn for the pattern. 

A great way to match the yarn to the pattern is to “audition” the yarn.  I like to buy a skein of the yarn and knit it in a number of different ways.  It’s the only way to really see what kind of variegation it is and what designs it can create in the knitted fabric.  Here are my favourite "auditions":

1.  The Rotating Square: 
This sample uses Worsted Weight yarn & US Size 6 needles.

Cast on 20 stitches
1.     Work 35 rows in Garter Stitch; Bind off on Row 36, leaving the last stitch on your needle (This will be the first stitch of the next section.).
2.     Pick up and knit 20 stitches down the left side of the square.  Knit 34 more rows.  Bind off, leaving last stitch on your needle.
3.     Pick up and knit 40 stitches down the left side of your work.  Knit 34 more rows.  Bind off, leaving last stitch on your needle.
4.     Pick up and knit 40 stitches down the left side of your work.  Knit 34 more rows.  Bind off, leaving last stitch on your needle.
5.     Pick up and knit 60 stitches down the left side of your work.  Knit 34 more rows.  Bind off, leaving last stitch on your needle


2.  The Square Knit in the Round:
This sample uses Worsted Weight  yarn & US Size 6 double-point needles

Cast on 8 stitches and divide evenly onto 4 needles.
Knit one round.
Round 1:  K1, YO, K1.  Repeat for each needle.
Round 2:  Knit.
Round 3:  K1, YO, K1, YO.  Repeat for each needle.
Round 4:  Knit.
Round 5:  K1, YO, Knit to last stitch on needle, YO, K1.  Repeat for each needle.
Round 6:  Knit

Repeat rounds 5 and 6  until the square is the desired size  (preferably until you have gone through all the variegations repeats at least once.)

3.  The Pinwheel:
This sample uses Worsted Weight yarn & US Size 6 needles.

Cast on 18 stitches.
Row 1:  Knit 3; turn.             Row 2:  Knit to end
Row 3:  Knit 6; turn.             Row 4:  Knit to end.
Row 5:  Knit 9; turn.             Row 6:  Knit to end.
Row 7:  Knit 12; turn.           Row 8:  Knit to end.
Row 9:  Knit 15; turn.           Row 10:  Knit to end.
Row 11:  Knit 18; turn          Row 12:  slip first stitch as if to purl, knit to end.

Repeat rows 1-12 until you have a full circle.  Sew seam.


4:  A Simple Square:
This is a free-for-all.  Cast on at least 30 stitches and do whatever you want.  I like to have a section in Stockinette Stitch, a section in Garter Stitch and a section in Seed Stitch just to get an idea of how it looks in a variety of stitches.

Just to be sure to knit it big enough to get a very good idea of what it would look like in a larger project.


6:  The I-Cord:
This sample uses Worsted Weight yarn & US Size 6 double-point needles.

Cast on 4 Stitches.
Row 1:  Knit.  DO NOT TURN WORK.
Row 2:  Slide Stitches to right end of needle;  with yarn in back, knit across row.  Do not turn work.
Repeat Row 2 until cord has reached desired length.

 In the samples at left, you can see how variegations differ.  The top sample uses yarn that has a long variegation and throughout the project I didn’t actually get to all the colours in the yarn.  The bottom sample uses yarn with a short variegation and it created a repeated stripe pattern.


All this goes to show that pretty in the skein doesn’t always mean pretty in the piece.  That’s why I recommend trying out some of these test swatches before committing a project to variegated yarn.  Here’s a prime example:  


←the yarn is … okay. 

Same yarn  in an I-Cord necklace … nice!→


This month, play with variegated yarn to discover its possibilities and limitations.

For a long-term project:  make 20 Rotating Squares and stitch them together for a lap blanket (4 across, 5 down).  So pretty!

Friday, April 27, 2012

Buddies


buddy n. a companion, friend or pal in an informal way

Buddy is a happy word. It makes you smile. Try to say "Hi buddy!" without smiling! Or try to introduce someone as your buddy with a serious face. Probably a little tough.

Now what the heck does buddy have to do with knitting? Well, this month's project was inspired by a simple little email from my brother. He wrote, "I saw something at a friend's house that seemed simple and rather useful. A knitted tube about 2 or 2-1/2 inches in diameter and about 16 inches long. It it used to hold wadded up plastic grocery bags to take to recycling. Stretches to accommodate a ton of those things."  I knew exactly what he was asking for ... a Bag Buddy!

I contemplated what kind of Bag Buddy I would make ... (1) a tasteful colour, (2) a durable fiber, and (3) a nice way to hang it.

A tasteful colour. Hmmm. I guess any colour you like can be "tasteful". I look around my house and wardrobe and accessories and decided that for me it's black. Do you know how many "little black dresses" I own?! More than I probably need, but it's my go to whenever I don't know what to wear. It's even my go to colour for knitting! So, logically, I had decided to make the bag buddy in black.

A durable fiber. This took a little more thought. An acrylic, wool or cotton yarn might pill and fray from repeated rubbing with balled-up plastic bags. A nylon yarn might work, but I haven't yet found a decent nylon yarn. Then I remembered an old yarn -- Phentex Slipper and Craft yarn. And guess what, you can still get it! 2 skeins of black, please.

A nice way to hang it. I decided I would like a Bag Buddy that would hang from a metal or wooden ring, rather than a loop of yarn. A loop of yarn would eventually break just from normal wear-and-tear. So my design had to incorporate a way to hang it with a ring.

One other design consideration was making a wider opening at the top to stuff the bags in, and a narrower opening at the bottom to extract only one bag at a time.

With my goals set, I knitted swatches of the Phentex to decide on the needle size I wanted to use. Next was deciding the size of the bag, which then determined how many stitches I would cast on. And, as I so often do, I just sat down and started knitting, deciding increases and patterns as I went along.

It only took three tries before I had the design I envisioned. So this month, I challenge you to make a Bag Buddy to contain any plastic shopping bags you might have laying around. Putting them neatly into your Bag buddy will surely make you smile!

One last note about buddies ... every third Saturday of the month is "Knit-with-a-friend Day". Let's call it "Buddy Knitting Day" this month! Plan now to have a spring knitting session with your buddies on May 19th!

Saturday, March 31, 2012


Change  \chānj\  v.  1. To make different in some particular way  2. To replace with another


Have you ever found a pattern you really like but you weren’t so fond of the pattern stitch?  Or maybe you found this really cool pattern stitch and wanted to use it on a different pattern?  Well, that’s what this month is all about:  changing a pattern to fit a different stitch or color work design.


I used the baby hat pattern from February for this exercise.  There are a few things to consider before simply imposing a new pattern stitch to a project.

  • How many stitches does your project have?
  • How many stitches does the pattern stitch work over?
  • Can you multiply the pattern stitch repeats to fit your project?


Confused?  Let’s break it down.  The Newborn Baby Hat has 66 stitches.  To stay within the size range of a newborn’s head, those stitches can be increased to a maximum of 70.  I know I can choose a pattern stitch that is a multiple of 66-70 stitches. 

The first pattern stitch I wanted to try was a very simple lace pattern.  The pattern was created over 10 stitches.  I increased my number of stitches on the hat pattern to 70 and did 7 repeats of the lace stitch. 

But wouldn’t that affect how I would do the crown decreases?  Yes and no.  The method of decreasing on the crown is also a simple mathematical problem.  You want decreases to repeat over 9-11 stitches to get a nice top shape.  For example, for decreases worked over 10 stitches you would knit 8 stitches, then knit 2 together … and then repeat that all the way around.  Each following row you simply knit 1 less stitch before knitting 2 together – k7, k2tog – k6, k2tog – etc.


Next, I tried a simple chevron lace stitch.  This pattern was also worked over 10 stitches, so all the changes I had done for the lace hat were applicable. 

Last, I decided to try some color work.  I found a little interlocking swirl pattern that I thought would make a cute hat.  It was worked over 6 stitches.  Easy!  The original hat pattern uses 66 stitches … 6 stitches  x  11 repeats  =  66 stitches


So there you have it.  3 new and completely different looking hats from one simple pattern.  I’ve added all three variation instructions on the Patterns page for you.  This month’s challenge:  make your own ch-ch-changes the newborn hospital hat.  And … why not send me a photo so we can see what you’ve done!

Friday, March 16, 2012


Green:   adj.  1. of the colour of green    2. tending to preserve environmental quality (as by being recyclable, biodegradable, or nonpolluting)

What better day that St. Patrick’s Day to talk about being a ‘green’ knitter?!   Being a green knitter means:
  • Source local yarns
  • Use organic yarns
  • Use yarns coloured with safe dyes
  • Choose needles with the lowest environmental impact
  • Re-use and re-cycle yarns
  • Knit items that can replace disposable items in your home
Source Local Yarns
If there are sheep or alpaca farms in your area, chances are there are also local yarn producers.  A quick internet search of a 100-mile radius of my area resulted in 7 local studios are producing hand-spun wool and hemp yarn entirely by mechanical means and with no chemicals!

Organic Yarns
Most ‘organic’ yarns are plant-based yarns.  These include yarns made from soy, bamboo, corn and hemp.  And to be truly organic, the plants must be grown without the use of pesticides;

Corn fibre yarns are among my favourites.  The starch and sugars from corn kernels is processed to produce a long chain, or ‘polymer’ call PolyLacticAcid (PLA).  PLA is biodegradable and requires less carbon to produce than acrylic yarns.  Corn and cotton-corn blend yarns are very soft and therefore especially nice for light-weight knits.  And who wouldn’t love a yarn that is
  • Washable,
  • Breathable,
  • Moisture-wicking,
  • Odor-resistant,
  • Wrinkle-resistant,
  • Hypoallergenic, and
  • Antibacterial.
Maybe my soft spot for corn fibre yarns is partially nostalgic since I grew up in Midwest America surrounded by acres and acres of … CORN!!


Safe Dyes
 
Safe dyes are usually less harmful to the ecosystem and include:

Clay/dirt dyes.  Clay dyes are made from the minerals and irons in the earth.  These types of dyes have been used for centuries.

Low-impact fiber-reactive dyes.  These are synthetic dyes that chemically bond directly to the fibre molecules.  This results in less water run-off due to the fixation rate being up to 70%.  Unlike conventional dyes, these dyes contain no heavy metals or other known toxic substances.  The biggest drawback of low-impact fiber-reactive dyes is that they are still made from synthetic petrochemicals. 

Natural dyes.  These are a class of colorants extracted from vegetative matter and animal resides.  You might assume that natural dyes are better for the environment and you would be right.  However, without the inclusion of metallic salts such as aluminium, iron, chromium and copper natural dyes are typically not colourfast.

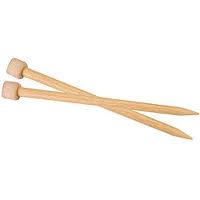
Eco-Friendly Knitting Needles

Ask anyone what type of needle is ‘eco-friendly’ and you will get a resounding answer of CHOOSE BAMBOO.  Bamboo is a fast-growing, strong natural material and many bamboo needles are made without the use of petro-chemicals in their finishing.

This is where, admittedly, I veer off the green path.  I personally find bamboo needles need regular replacement.  The smaller sizes bend and curve from the heat of your hand and while they are virtually noiseless, they are not silky smooth to work with.  Again … that’s just my experience.  I invested in Addi Turbo needles which are lightweight, quiet and silky-smooth and shouldn’t need replacing for the rest of my lifetime.

So, if you too aren’t that sold on bamboo but want to be ‘green’ you can always scour flea markets and garage sales for used knitting needles.  You’d be surprised at what you might find!

Re-use and Recycle Yarn

This category of yarn does require a bit more work than visiting your local Michael’s store and grabbing a ball off the shelf! 

Why not re-purpose a sweater by re-using and recycling the yarn?  There are consignments shops all over that have sweaters that are out of style, but made of good-quality, good-looking yarn.  Buy them up for a song, unravel them and make a new creation.  (Watch for a project on how to do this later this year!)  You might even find something in your own closet that is ready to be re-purposed.

Another option is making ‘yarn’ from fabric or plastic.  Plarn, in particular, is yarn made from plastic shopping bags.  It’s easy (a bit  time-consuming) and definitely green.  There are a number of YouTube videos on making Plarn.

Knitting Green Items
Lastly, what you knit can be as green as what you knit with.  Knitting useful items that can replace disposable products in your home takes a step against filling our landfills with disposable convenience items.  What can you knit? 
  • Dishcloths ad facecloths to replace ‘J-wipes’ and make-up remover wipes.
  • 'Swiffer’ duster covers that are washable and re-usable (and actually work better than the disposable commercial covers!)
  • Shopping, or market, bags (this is a good way to use up your closetful of plastic bags by turning them into Plarn for knitting a shopping bag!)


What other inventive ‘green’ items can you think of?